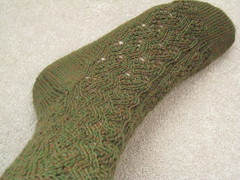
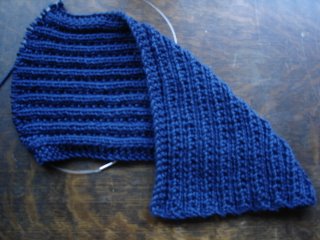
* With yib, place RHN under LHN. Wrap yarn under (from left to right) and over LHN and then under (from right to left) and over RHN. (Loops made on both needles.) Pull loop on RHN through. Yarn forward (under LHN). With yif, slip st from RHN to LHN purlwise. Two sts cast on. Yarn back (under LHN). Repeat from * until desired number of sts are cast on.
Tuesday, October 24, 2017
stretchy cast on for ribbed edge
* With yib, place RHN under LHN. Wrap yarn under (from left to right) and over LHN and then under (from right to left) and over RHN. (Loops made on both needles.) Pull loop on RHN through. Yarn forward (under LHN). With yif, slip st from RHN to LHN purlwise. Two sts cast on. Yarn back (under LHN). Repeat from * until desired number of sts are cast on.
Monday, August 6, 2012
picking up stitches for the thumb
I've looked around for information on how to pick up stitches at the side of a thumb-hole opening and haven't found anything that works better than this:
This is for the simplest thumb-hole opening, an afterthought thumb.
The first step is to pick up stitches from the top and bottom of the opening and then remove the scrap yarn.
(There will be as many stitches on the bottom as were knitted with the scarp yarn. There will be one fewer stitch on top.)
Attach yarn and knit the picked up stitches on the bottom of the thumb opening.
Knit together 2 stitches at the side of the opening (or, in other words, knit the next stitch together with the one above it).
With a second needle, knit the picked up stitches on the top.
Knit together 2 stitches at the side of the opening.
Then proceed to knit in the round.
(You may want to work an ssk as the last st on each needle on the first round.)
Wednesday, August 24, 2011
binder clips
I really like using binder clips for intarsia. For the project I'm currently working on, I have every other strand of yarn on yarn bobbins. The rest of the yarn is wound into balls and clipped onto the project with binder clips.
Binder clips are a bit heavy, but the yarn doesn't get tangled. Yarn bobbins are lighter, but the yarn often does get tangled.
Saturday, March 19, 2011
Trek Potholder

It's my first try at double knitting. It took me quite a few tries to get it looking the way I'd like. And, as a bonus, my gauge got more nearly even with each try. ;)
I probably did the edges "incorrectly". But, at least, they're something I like.
Here are my adventures:
The first thing I tried for the cast on edge was casting both colors on at the same time. But, I didn't like the look and so ended up working a provisional cast on in red and then knitting yellow on one side and red on the other.
For the side edge, I first tried working the edges just as I would any other stitch in the row. The edge looked sloppy. And, I wasn't sure how easy it would be to crochet the edges together when done. Then I tried slipping the first stitch of every row. That was a little better. Then I tried knitting the 2 yarns together at the end of a row and slipping the first stitch at the beginning of a row. That gave an edge that was thicker than the rest of the potholder. I finally ended up slipping the first 2 stitches of every row (1 st in each color) and then twisting the yarn so that the edges would hold together even before the crochet edging was added.
Finally, for the top .... (since I was pretty sure I had broken most of the "rules" for double knitting anyway) .... I repositioned all the sts (2 at a time) and worked a sc in red through each pair (1 of each color).
From there it was easy to single crochet around (working extra sc's in the corners).
Monday, October 25, 2010
bunny mask
He's going to wear the mask during a charity online video-game-playing marathon just after the first of next year. As I understand it, for the game he's going to be playing, the main character pretends to be a rabbit for a while. He's going to don the mask for that section of the game.
edited to add link: Speed Demos Charity Marathon, January 6 - 11, 2011
The hat is a combination of two different patterns: a panda ski mask pattern for the main part of the hat -- with changes to the nose and mouth to make it more bunny like -- and a bunny ears pattern for the ears. (I scouted the patterns for him.)
I didn't tell him how difficult the pattern was until he was finished. ;)
Tuesday, August 10, 2010
Diamond Spiral Socks
While reading another thread in the same Ravelry group, I came across a new (to me) heel, the yo-yo (German Jo-Jo heel). There is a nice description of the heel at tessknits.com and also with Silke Pieper's Farnkrautsocken. I've grown to love the heel!
So, I frogged half of the sock with the zig-zag front and reworked it with a yo-yo heel. The pattern is now in Ravelry under the name Twin Diamond Spiral Socks.
Now, another thing about me is that I often run out of yarn. This was the case here. I had only 2 skeins of Stroll Inca Gold Tweed -- which just wouldn't make it for 4 socks -- even with my narrow feet.
So, the cuffs for both socks are now Stroll Navy Tweed (which I had less than a skein left of). I still didn't have enough Inca Gold to work 2 more socks. So, the toe for the second pair of socks is also Stroll Navy Tweed. This pattern is in Ravelry under the name Diamond Twin Spiral Socks. Its cuff has 2 rows of eyelets instead of just the 1. To keep the cuff from flaring out, there are decreases in the middle of the cuff.
The pdfs can be downloaded directly from these links:
Diamond Twin Spiral Socks
and
Twin Diamond Spiral Socks.
Friday, November 20, 2009
Toby's Sweater
NOTES:
I chose a 17 st cast on at the end of the BACK section since 17 is about a fourth of 70. I made the leg opening increases and decreases a few sts from the edge but think they'll look better as written below. I made the increases for the BACK 3 sts in from the sides.
SIZE:
girth: 21"
neck: 11"
length: 16"
MATERIALS:
1 skein Vanna's Choice Colonial Blue (MC)
½ skein Vanna's Choice Mustard (CC)
size 9 [5.5 mm] knitting needles
crochet hook
GAUGE:
16 sts + 32 rows = 4 inches [10cm] in garter st
Garter st pattern: When knitting back and forth, knit every row. When knitting in the round, knit one round then purl the next round. Repeat.
BACK:
With MC, cast on 29 sts. Work in garter st, increasing 1 st near beginning and end of every RS (knit) row 4 times (to 35 sts), then every other RS row 9 times (to 53 sts). Knit 3 more rows.
Change to CC and knit across 53 sts (on RS). Mark start of round. Cast on 17 sts. Place a second marker. Join to start working in the round. Purl 53 to reach end of round. Work in garter stitch to 6 ridges of CC (10 more rounds).
LEG OPENINGS:
(The chest is worked in CC, the back and sides in MC.)
Row 1: In CC, ssk, k to 2 sts before marker, k2tog. In MC, ssk, k to 2 sts before marker, k2tog. Turn.
Row 2: In MC, knit to marker. In CC, knit to marker. Turn.
Repeat Rows 1 – 2 three more times.
Row 9: In CC, knit to marker (9 sts). In MC, knit to marker (45 sts). Turn.
Row 10: In MC, knit to marker. In CC, knit to marker. Turn.
Repeat Rows 9 – 10 once more.
Row 13: In CC, k1, make 1, k to 1 st before marker, make 1, k1. In MC, k1, make 1, k to 1 st before marker, make 1, k1. Turn.
Row 14: In MC, knit to marker. In CC, knit to marker. Turn.
Repeat Rows 13 – 14 three more times (to 17 sts in CC and 53 sts in MC).
Break MC to begin knitting with CC only (in the round).
FRONT:
With CC, work in garter st in the round, to 6 ridges of CC (12 rounds), starting with a knit round. Decrease on every knit round by knitting to first marker (17 sts), k3, ssk, k to 5 sts before end-of-round marker, k2tog, k3. End on a purl round.
COLLAR:
With MC, knit around.
Set-up round: (k1, p1) 9 times, (k1, p2tog) 4 times, (k1, p1) 13 times, (k1, p2tog) 4 times, k1, p1. (50 sts).
Work in (k1, p1) rib for 4". Bind off in pattern. Fold collar back.
FINISHING
Single crochet around each leg opening in MC. Weave in all ends.
Thursday, October 15, 2009
Serenity
Recently, I came across a pattern for Wash's Sweater, as seen on the tv series Firefly.I liked the cables but wanted the Serenity cable row repeat to be shorter (since I didn't want a sweater as long as the original would produce).
After quite a bit of thought, I started with a lattice cable like the one on the right (using the Open Office equivalent to Excel).
Then I took out sections of cabling to get the heart-shaped sections in the second chart. This is the chart I'm going to use for the sweater.In both charts, the 6-space-wide sections represent 6-st-wide cables -- either knit 3 over purl 3, knit 3 over knit 3, purl 3 under knit 3, or knit 3 under knit 3. The 4-space-wide sections beginning and ending with a slash (or backslash) are 4-st-wide cables -- either knit 3 over a purl 1 or purl 1 under knit 3.
Edited (a few days later): The sweater looks better with the middle six knit sts of Rows 17, 18, and 49 of the second chart replaced by purl sts.
Finally, here is a chart for the sleeves. As before, the slashes indicate cables. I've shown only the center top of the sleeve plus one side of the sleeve -- and only as far as when the sleeve sts are to be put on a holder for use when finishing the sleeve. The circles show where increases are made. (They're more like lifted increases than yo's. They are finished in the next row by being worked twisted.) And, as before, the middle six knit sts of Rows 17, 18, and 49 of the chart look better when replaced by purl sts.Tuesday, August 25, 2009
WS colorwork
My main problem was seeing the stitch that I was going to purl into (possibly since I knit Continental style). For this colorwork, I had blue at the top, brown in the middle, and green for the bottom thread. Keeping an order like this helps keep the yarn from twisting. The picture shows preparation for purling in green with blue and brown off to the right side.
When preparing to knit in brown, I left green to the left and blue to the right. For blue, both green and brown were left to the left.
As a side note, when working on the RS, I kept the same order, with blue in my right hand, brown over the index finger on my left hand, and green over another finger on my left. This was my low tech way of keeping the yarn from twisting.
A final note (mostly to myself): After turning (for the short-row part of the heel), before making the first st in a row (after the slip stitch), wrap the other 2 yarns under the yarn to be used in that st. When I didn't do that, I had holes. For the pair of socks I made with this pattern, I left one heel with holes and one without to help me remember this.
Friday, August 14, 2009
Mobius band cast on
As I was reading the directions (Method 1), I thought to myself that the band could be worked even more easily with interchangeable circs.
Cast on the desired number of sts using a Turkish cast on (over 2 circs). (In the pic, I wrapped the yarn around the circs 126 times, for the pattern I was going to make.) Then knit back (or k1p1 back) over those stitches (for the example, 126 sts). These stitches form the "soul" or center of the band. (I placed markers every 18th st because the pattern I was going to use has a repeat of 18 sts.)
Then working with the part of the band away from the loose end, take off the needle tip and the cap. Place the needle tip where the cap was and the cap where the needle tip was. The pic shows the band after the exchange. Lay the work out so nothing is twisted (as in the pic).
Mark the beginning of the round and begin knitting whatever pattern you've chosen for the band. There will naturally be a single twist in the work. Work in pattern until you've knitted all the sts off the circ (126 sts). All the sts (all 252 of them) are now on the same circ.
A picture of the first Mobius band I knitted is here. It's the last pic in the post. It was knit with worsted weight cotton yarn.
Note: The first pic here shows 2 circs of equal length. It works out better to have the circ on which the "soul" is knitted to be a bit longer since it will eventually be the only circ in use and have to be long enough for twice the "length" of the band.
Thursday, March 5, 2009
Twists, etc
My German isn't that good. This is what I think I read:
(Well, after the translation came out, I discovered that I had misread second for two , and the directions are for the usual pinch method of cabling without a cable needle. But, the following directions do work.)
For a right twist: Put the RHN (right hand needle) into the first 2 stitches of the LHN (left hand needle) as if working a k2tog. Slip the 2 sts off the LHN but do not knit them. Slip them back onto the LHN purlwise. The sts are twisted with the st nearest the tip of the LHN lying over the next st. Knit the first st tbl (through the back loop). Knit (or purl) the next st tbl. (Purl the second stitch if you want a right twist with purl back. Otherwise knit it.)
For a left twist: Just as the right twist starts out as if one were making a k2tog, the left twist starts out as if one were making a ssk -- or more accurately a ssp. Reposition the first 2 sts on the LHN needle as if working a ssk or ssp. (In other words, slip the 2 sts to the RHN individually knitwise. Then slip them back to the LHN purlwise.) Slip the RHN into the back of the 2 sts on the LHN as if working a ssp. Slip them off the LHN but do not purl them. Slip them back onto the LHN purlwise. Knit (or purl) the first st. (Purl the first stitch if you want a right twist with purl back. Otherwise knit it.) Knit the second st.
For a left twist (with fewer steps): Slip the first 2 sts on the LHN individually to the RHN. With the points of both needle facing the same direction and the LHN in front of the RHN, place the LHN into the 2 sts and slip them off the RHN. Knit (or purl) the first st. Knit the second st.
Now to decreases and increases....
After reading about making centered double decreases instead of paired single decreases for shaping sleeves, etc. in Knitting Daily, I've found that I like them a lot. I use Fleegle's method of making a centered double decrease. But, instead of working the stitch in one step as she does, I first slip the 1st 2 sts on the LHN to the RHN together knitwise. Then slip the next st on the LHN to the RHN knitwise. Finally, knit the 3 sts together through the back loop. This leaves a ridge in the center (equivalent to s2kp or cdd). On the other hand for a centered double decrease that looks like a sk2p, slip 1 st knitwise from the LHN to the RHN. Then slip the next 2 sts together from the LHN to the RHN knitwise. Finally, knit the 3 sts together through the back loop. (These have the added advantage, at least for me, of being easier to frog than the "pass st over" methods.)
I wasn't able to find anything on centered p3tog's. So, here's how I ended up making some in order to have the stitch look like a centered k3tog from the wrong side:
Leave the yarn in front. Turn the knitting over so that the yarn is now in back. What was the RHN is now the LHN and vice versa. Slip the 1st 2 sts on the LHN to the RHN together knitwise. Then slip them back to the LHN purlwise before finally knitting 3 sts together through the back loop. Slip this st back to the LHN knitwise. Turn the work over. The stitch is complete.
Finally, to get a centered double increase to match the centered double decrease (for shaping). In the same stitch, p1, yo, p1.
Here's a link for an interesting and, at least for heavier weight yarns, better, way to make a double increase. And since sometimes links disappear, here is a brief summary: k1tbl, k1 in same st. Place vertical bar of st just knit onto LHN. k1. You get a nice single increase by just working the first part of the stitch (k1tbl, k1 in same st).
Wednesday, February 4, 2009
Peeries
quoting Elizabeth Lovick (from a Yahoo! EZasPi post):
"Peerie is the Shetland word for peedie. (And little is the English word for peedie!!) The peeries are the patterns of 1 to 4 or 5 rows deep.
The boarders [borders] are the next size up - from about 7 to about 11 rows deep. After that come the OXOs and stars...."
from the Encyclopedia of Knitting by Stanfield and Griffiths:
"Little two and three row patterns [peeries] ... are often used as a contrast between more complex bands of motifs."
"Some ... borders are built up out of peerie patterns, while others stand alone. ... (F)or a more authentic color scheme, change the background for each band of pattern."
Also, I think I have figured out why we started with a stockinette edge rather than a ribbed one. -- A curled stockinette edge would be a lot warmer.
about colors, from Elizabeth Lovick (from a Yahoo! EZasPi post):
"The earliest FIs done on FI are bright blue, bright red
bright yellow with dark brown and very pale fawn, grey or white...."
Monday, January 5, 2009
Corrugated Rib
Recently, I test knit a corrugated rib hat for Amy. Corrugated ribbing is ribbing with the purl sts in one color and the knit sts in another.Since I'd never done any corrugating ribbing before, I searched the web for info. Here are my adventures in making the hat:
First comes the supposed problem with curling and with strands peeking out from the edge. After a few attempts, I ended up with a knitted cast on (though a single cast on would work as well, and also, I suppose, a cable one).
Then, more importantly (to prevent curling), I did one round in k1p1 ribbing with the same color -- dark gray.
After this round, I added the second color. I tried having the purl color in my right hand -- but found it very difficult for me to purl English style. (I generally knit Continental style.) So, I ended up with the purl color (white) in my left hand and the knit color (dark gray) in my right hand. It worked out well -- and was surprisingly relatively fast and easy. The second picture shows both the right and wrong sides of the hat.I used Patons Classic Wool Merino and size 7 needles. There is no problem whatsoever with curling and my DD has a nice warm stylish hat.
Tuesday, December 23, 2008
Picking up sts from a cast-on edge
Here's an alternative way of picking up stitches from a cast-on edge. The main advantage to this technique is that it can be done in pattern -- in this case, a "k4, p3" pattern.The easiest cast-on edge to pick up from, using this technique, is a single (or backwards loop) cast on. The single cast on has less bulk as well. (The long-tail cast on would work as well since it looks exactly like a single cast on followed by a row of knitting.)
I'll be illustrating the technique for the bottom of an armhole for a raglan worked from the top down. The first picture shows the bottom of the armhole half done. The other half will be picked up after knitting around the rest of the armhole -- so that rounds will begin and end at the middle of the underarm.
The first step is to identify the 2 loops of yarn over the first stitch to be picked up -- in this case, a knit stitch.One of these loops starts out as the right-hand-side of the stitch and then travels left over the stitch. The other starts out as the left-hand-side of the stitch and then travels to the right.
The second picture shows a crochet hook ready to pull yarn through the top of a knit stitch.
Once the loop is pulled through, place the yarn over the waiting needle so that the free end of the yarn (as opposed to the loose end) lies behind the needle. The part of the yarn nearest the loose end lies in front of the needle.
The next stitch to be picked up is also a knit stitch. The 3rd picture shows the progress after 2 knit stitches have been picked up.The next stitch to be picked up is a purl stitch.
For purl stitches, the technique is a bit different.Bring the yarn to the front of the work. Draw the yarn from front to back through the 2 loops at the top of the stitch. (The loops can be seen more easily from the back of the work.)
The last picture shows the progress after 3 sts have been picked up. The next 2 sts to be picked up are also purl sts. So, the yarn should remain in front while picking up the stitches.The last 2 sts to be picked up before working the sides and top of the armhole are knit stitches. The yarn should be moved to the back before picking up these stitches.
For the corner of the armhole, I haven't made up my mind whether or not to pick up one more stitch before knitting sts off the cable. Sometimes I pick up one more stitch from the same row; sometimes I don't.
Whichever, ..... I like to knit together the last picked up stitch with the nearest stitch on the cable (and also the first stitch to be picked up on the opposite side of the armhole with the nearest stitch on the cable).
To start working off the cable, of course, remove the cap on the cable and replace it with a needle (the same size or a smaller size than the one used to pick up sts). Slip the nearest stitch from the cable onto the needle used to pick up stitches. Then pass the second st on the needle (the last one picked up) over -- (or else, ssk). Work around, in pattern -- except, slip the last stitch on the cable onto the working needle. Pick up 1 st from the unworked side of the armhole. Place these 2 sts on a spare needle, pass stitch over, return the remaining st to the working needle (or else, k2tog)-- a mirror image of what was done on the opposite side of the armhole. Pick up the rest of the stitches at the bottom of the armhole, and begin working in the round.
Thursday, November 6, 2008
Bamboo waves sock
edited: Whenever, I reknit something, I can't help but change it a little. A new version of the pattern is available for free on Ravelry. It is now sized in multiple sizes, has a different way of making the leg increases, and has an eyelet cuff. Here is a pic (in Knit Picks Stroll yarn):

The original (shown below) is knit from yarn courtesy of a lady from the knitting group I belong to and owner of My Small Wonders (which is where the yarn in the pic comes from). She wanted to see what her hand-painted yarn would look like knitted up into sock. The yarn was a pleasure to work with. Here's the pattern that resulted:
Materials:
1 skein (100g) sock yarn
two size 1 circular needles
Gauge: 8 sts and 12 rows per inch (Row gauge is not important.)
Pattern (5 sts by 12 rows):
All even rows: Knit across
Rows 1, 3, 5: yo, k1, yo, ssk, k2tog
Rows 7, 9, 11: ssk, k2tog, yo, k1, yo
Reverse Pattern (5 sts by 12 rows):
All even rows: Knit across
Rows 1, 3, 5: ssk, k2tog, yo, k1, yo
Rows 7, 9, 11: yo, k1, yo, ssk, k2tog
The pattern is abbreviated "patt". The reverse pattern is abbreviated "rev patt".
Toe:
Cast on 7 st on each needle using Turkish cast on.
Knit around.
Increase every round to 13 sts per needle.
Increase every other round to 31 sts per needle.
Knit even to about a 3" length (about 14 rounds)
Foot:
On needle 1: k2, patt, k2, patt, k3, rev patt, k2, rev patt, k2 (31 sts). On needle 2: k across.
Continue until the length is about 2 1/2 " (30 rounds) shy of the total desired foot length. For where the 30 rounds comes from, look at my post on the Widdershins heel.
Gusset:Make gusset increases every other row to 53 sts on Needle 2. Meanwhile, keep following the pattern on Needle 1. The last pattern row on Needle 1, before turning the heel, should be an even row. Do not knit across on Needle 2. Instead .....
Turn heel:
Place markers 15 sts in from either side of Needle 2, leaving 23 sts between markers. The stitches between markers are the heel sts. The sts outside the markers are the gusset sts. Then, working only on the heel sts:
Row 1: k to 4 sts before marker, kfb, k1, turn
Row 2: s1, p to 4 sts before marker, pfb, p1, turn
Row 3: s1, k to 4 sts before gap, kfb, k1, turn
Row 4: s1, p to 4 sts before gap, pfb, p1, turn
Repeat Rows 3 – 4 until there are 31 sts between markers.
(On purl rows, s1 – slip 1 purlwise with yarn in front. On knit rows, s1 - slip 1 knitwise with yarn in back.)
Heel flap:
Row 1: s1, k to last heel st, ssk last heel st and 1 st from left gusset, turn
Row 2: * s1, p1 * to last heel st, p2tog last heel st and 1 st from right gusset, turn
Repeat Rows 1 – 2 until there is only 1 st to be picked up, a right gusset st. (You'll be ending with Row 1.) Do not turn. Work the next pattern row on Needle 1. When you reach Needle 2 again:
k2tog (to get rid of the last gusset st), * k1, s1 * across.
The heel is now finished.
Leg:
Continue working in the round. Work same pattern row on Needle 2 as was worked on Needle 1. To increase, change an ssk or k2tog to a k2.
1st pattern repeat, increase on row 11 between side zig-zags.
2nd pattern repeat, increase on row 11 on outsides.
3rd pattern repeat, no increase
4th pattern repeat, increase on row 1 in the middle and then on row 11 between side zig-zags
5th pattern repeat, increase on row 11 on outsides.
6th pattern repeat, no increase
There are now 41 sts on each needle.
Cuff:
The cuff has k1, p1 ribbing. But, to get the purl stitches over the yo's, there are three p2tog's.
Next round:
k1, p2tog, (k1, p1) twice, k1, p2tog, (k1, p1) 8 times, k1, p2tog, (k1, p1) 5 times -- on each needle
Next 9 rounds: (k1, p1) around
Bind off.
Wednesday, July 23, 2008
I-cord cast on
Here is my new and different way of making an 3-stitch i-cord cast on:
1. Cast on 4 stitches.
2. Slide the stitches to another dpn or to the other end of a circ (just as you would to make an unattached i-cord).
3. k3
4. Wrap the yarn around the LHN (left hand needle) as in the picture by wrapping the yarn over the needle from the back and then under the needle again. The yarn starts out in back and ends in the back of the work.
5. Slip the 3 stitches on the RHN (right hand needle) back to the LHN purlwise.
Repeat steps 3 - 5 until there are the LHN has on it the desired number of stitches to be cast on plus 2.
To end, you can then k2tog, k1, return the stitches to the LHN, k2tog, and then return this stitch to the LHN.
Wednesday, August 22, 2007
Summer Square boatneck raglan
This is a summery extra-short sleeve raglan. The directions are for a medium size and worsted weight yarn (with a gauge of 4 sts per inch) and size 7 needles. Size 5 needles are used for the sleeve finishing. I used 7 skeins of shine worsted yarn (525 yds). Most people would need 8 skeins.
It can be made larger/smaller by either doing more/fewer increase rows in the raglan shaping section or casting on more/fewer sts. (If casting on more/fewer sts, try to leave the neckband ratio similar. In this pattern, there are 33 sts for the front/back panel and 11 sts for each sleeve -- a ratio of 3 to 1. So, one could decrease to 27 and 9 -- again a ratio of 3 to 1 and again both odd numbers. One could also increase to 39 and 13.)
It's not necessary to work the pattern. I added it because I thought I'd get bored doing straight stockinette for the rest of the pullover. A blog entry on the pattern is here. It includes a variation of the chart made before I realized that charts are read from the bottom right corner up and across. It also includes a discussion on the best way to join yarn for a slippery cotton blend.
Neckband:
CO 92. Join.
Work *p1, k1* around for 6 rounds, starting w the p1.
*p1, k11, p1, k33* twice
p92
Upper Body:
R1: *P1, k1, m1, knit to 1 st before next purl, m1, k1* four times.
R2: Knit the knit sts and the m1's, purl the 4 purl sts
Alternate these rnds to 34 increase rnds total and 228 sts total. Then do just R2 until 45 total rnds for me (51 for most people) not including the ribbing – or until the sweater lies 1” below the underarm. Then: p1, *k3, p3* around, k3, p2 (R1 of both the sleeve and garment pattern).
Lower Body:
*K1, put the next 47 sts on a spare circ, co9, k67* twice (152 sts total). This is R2 of garment and garment underarm patts. (The 47 sts to be put aside are the sleeve sts.)
The pattern chart doesn't show up well here. Another version is here. Click on the chart to see a close-up. A picture of the sweater is at that link and as the second sweater in the link here.
Continue w R3 of garment and garment underarm patts. (Every even rnd is knit around.)
After the patt rnds, continue shaping by decreasing 4 sts every 10th row above the waist and increasing every 5th row below to end with 152 sts at desired length.
Lower Garment Ribbing:
set-up round: *(k1, p1) twice, k1, p2tog, (k1, p1) twice* around, ending either w (k1, p1) or (k1, p2tog)
*k1, p1* around for 14 rnds.
Bind off.
Sleeves:
Use a needle 1 or 2 sizes smaller than for the rest of the garment. Starting with the middle stitch, knit 4 sts from the underarm cast-on sts, knit the last cast-on st together with the nearest sleeve st, knit to the last of the sleeve sts, knit that together w the nearest cast on stitch, and then knit 3 sts to reach the middle again. (54 sts) (This is R2 of the sleeve pattern.) Continue with R3 of the sleeve patt. (Every even rnd is knit around.)
Bind off.
Friday, June 15, 2007
K3P2 Boatneck Pullover
This is a favorite pattern. The idea came originally from knitty.com's Bob. The version I made (in the May 2004 archives of this journal) is the first sweater I made that my oldest complimented me on as being stylish. That one was knitted from the top down and in the round, just as this one is.
The yarn I used is Patons Classic Merino New Denim -- which was a pleasure to work with and a pleasure to wear. I used size 7 circulars and had a gauge of 4 sts and 6 rows per inch.
Neck:
CO 70. Join to work in the round.
K1, *p2, k3* 13 times, p2, k2 for 10 rounds.
Place marker after 2nd, 7th, 37th, and 42nd sts. (Each marker will be between 2 purl sts. These markers mark the centers of the raglan seams.)
Upper garment:
The raglan seams are k1, p1, (marker), p1, k1. Increases are made outside of the raglan seams on increase rounds, as follows: On increase rounds, work: m1, k1, p1, (marker), p1, k1, m1 with the m1's made to continue the p2, k3 pattern on the sleeves and garment. On the first increase round, each m1 is m1 knit. On the next two increase rounds, each m1 is m1 purl. For the next three increase rounds, it's m1 knit. ....
For a wider neckline:
Neck:
CO 80. Join to work in the round.
K2, *p2, k3* 15 times, p2, k1 for 10 rounds.
Place marker after 3rd, 13th, 43rd, and 53rd sts. (Each marker will be between 2 purl sts. These markers mark the centers of the raglan seams.)
Upper garment:
The raglan seams are k2, p1, (marker), p1, k2. Increases are made outside of the raglan seams on increase rounds, as follows: On increase rounds, work: m1, k2, p1, (marker), p1, k2, m1 with the m1's made to continue the p2, k3 pattern on the sleeves and garment. On the first two increase rounds, each m1 is m1 knit. On the next two increase rounds, each m1 is m1 purl. For the next three increase rounds, it's m1 knit.....
Alternate increase rounds with non-increase rounds to get a total of 20 increase rounds. Then k3p2 around in pattern until garment top is desired length. End with k3 before the first p2 (the center of the first raglan seam).
Lower garment:
Cast on 12 sts. Put the (purl) stitch before the first marker, plus the stitches between the first and second marker, plus the (purl) stitch after the second marker on a spare circular needle or scarp yarn. Work in pattern to one stitch before the third marker. Cast on 12 sts. Put the (purl) stitch before the third marker, plus the stitches between the third and fourth marker, plus the (purl) stitch after the fourth marker on a spare circular needle or scarp yarn. Work in pattern around. (150 sts on main circular needle.)
Work k3p2 ribbing for 14 rounds. On 15th round p2tog two p2 sts under each underarm
Start working in stockinette, doing double decreases under each underarm every tenth round until reaching natural waist. (My natural waist falls at 50th round and so I did a total of 4 double decreases.) Work evenly for about an inch. Make double increases under each underarm every fifth round until reaching the original number of stitches.
Work k1p1 ribbing for 6 rnds. Bind off (w decrease bind off)
Sleeves:
Starting with the center underarm, pick up and knit/purl in pattern until reaching the sts on the spare circ or scrap yarn. Pass the first two of these sts over the last st worked. Work in pattern to the last two sts in scrap. Slip these sts (to be passed over the next st worked). Pick up and knit/purl in pattern the rest of the underarm cast on sts – passing the two slipped sts over the first of these worked underarm sts. Work in pattern until sleeve is desired length (for a short sleeve, 20-30 rnds). (If I were to make this into a long-sleeve or ¾ sleeve pullover, I would work the ribbing until just above the elbow, then decrease evenly around by about 10%, then work in stockinette decreasing every inch or inch and a half, and finally work a p1k1 ribbing at the cuff – in order to match the sleeves more or less to the body of the sweater.) Bind off (w decrease bind off).
Thursday, May 17, 2007
OJ - drop-sleeve pullover
Every so often, there is a request on knitting boards such as knittyboard.com for an easy-to-make sweater. This is one of the easiest. The pattern itself is such that it can be made with almost any yarn and in almost any size. The sweater pictured is the 3rd sweater I ever made. The second sweater I ever made was to the same pattern. But, it's no longer with us. I accidently washed it on too high a heat setting and because of its acrylic content, it blossomed to twice its original size. The sweater pictured is too big for me. I made it before I learned to adjust a pattern. The stripes are optional. (There are a lot of major changes in the pattern below from the original pattern.)
Generic Drop-Sleeve Boat-Neck Pullover
The garment front and back are essentially large rectangles with ribbing at both top and lower edges. These are knit first. Then the top (leaving an opening for the neck) and the sides (leaving an armhole opening on each side) are seamed up. Last, stitches are picked up around each armhole to begin the sleeves. (I use 2 circular needles of the same size to make the garment.)
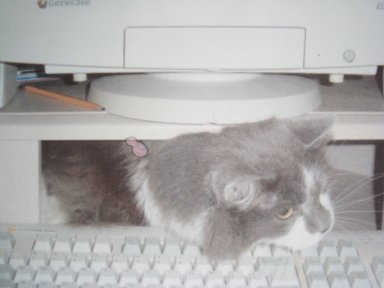
The pullover is named after a cat of ours who used to help me knit by lying on top of the yarn.
1. Calculate your gauge. Then decided how wide around you want the sweater to be.
2. Calculate the sweater circumference.
A gauge of 4 sts and 6 rows per inch and a width of 36”.would give 4 x 36 = 144 sts.
Half of these belong to the front and half to the back – 72 sts for the front.
Because of the ribbing pattern at the top, we want an odd number of sts on both front and back.
Add a st to give 73 sts for the front.
3. Then decide on how many sts to cast on for the front. Because of the nature of ribbing in general, cast on approximately 10% fewer sts
90 % of 73 is 65.7. So, cast on 66 sts.
4. Work k1, p1 ribbing for approximately 2". The knit 1 at the beginning and end of each row, except the first will make seaming easier (although some people prefer starting each row with a slip 1).
Row 1: K1, *p1, k1* 32 times, k1
Repeat Row 1 approximately 14 times. (edited: 13 Dec 2007)
5. Increase evenly across to an odd number of stitches.
Increase from 66 sts to 73 sts across.
K1, *p1, kfb, (p1, k1) 4 times*, repeat * to * across row, ending with k1
kfb is knit into the front and then the back of a stitch)
6. Knit body of sweater. (Until now the sweater has no right/wrong side.)
Row 1 (RS): K73
Row 2 (WS): K1, p71, k1
Repeat these rows until the sweater is 3 - 4" inches less than the desired length. End with a RS row.
7. Work top ribbing for 3 - 4". Bind off later.
Row 1: K1,*k1, p1* 35 times, k2
Row 2: K1, *p1, k1* 36 times
Repeat Rows 1 and 2 -- 11 times, approximately. Place sts on scrap yarn or a spare needle. Leave long enough tail to bind off 49 sts (2/3 of the sts).
8. Work sweater back the same as the front. (I worked back and front at the same time.)
9. Seam up garment top edge, leaving enough room for the neck. (Try on the garment with the top pinned together about a fourth of the way from each shoulder.)
Place garment right sides together. There will be a tail of yarn at each shoulder. Starting at one of the shoulders, bind off 20 sts from front and back (at the same time) using a 3-needle bind off. Then bind off 33 more sts from the part of the garment furthest away (using perhaps the decrease bind off). There are now 20 sts left on the back needle. Repeat this process starting at the other shoulder and the other yarn tail.
10. Seam up garment sides, leaving room for the sleeves. (Try on the garment to help decided how big a hole to leave for the sleeves.)
You can stop at this point and weave in all loose ends. The result is a nice-looking shell.
11. Pick up stitches to begin knitting a sleeve from the armhole down, starting at the bottom of the armhole. Because of the gauge, pick up 4 sts for every 6 rows on the armhole opening. Also, pick up an extra stitch at the garment side seam and the garment top seam. The total number doesn't matter, just so the same number of stitches are picked up when doing the other sleeve.
12. Knit the sleeves. Mark the starting point. This is the beginning of all rounds. For a tapered sleeve, make decreases every inch and a half, approximately.
Rounds 1-8: Knit around
Round 9: K1, k2tog, k to last 3 sts of round, ssk, k1
Repeat these 9 rounds until sleeve is desired length.
13. Make sleeve ribbing and bind off.
Round 1: *K1, p2 tog, k1, p1* around, ending either with k1, p1 or k1, p2tog
OR -- Round 1: *k1, p2tog* around, ending with k1, p1 or k1, p2tog or k1, p3tog
Round 2: *K1, p1* around
Repeat Round 2 for about an inch and a half. Bind off.
14. Make second sleeve the same as the first.
Friday, March 30, 2007
Edges
I thought I'd better write these thoughts down before I forget them.
First of all, I've discovered by watching Knitty Gritty, that I've been doing my knit cast on and probably cable cast on incorrectly. I'd been slipping the newly cast on sts with the needles pointing toward each other instead of pointing in the same direction. The latter gives a twist to the bottom of the sts and makes for a looser cast on. However, for the lace project I'm working on now, I prefer my old method. (The cast on loops aren't as large.)
Secondly, although a slipped st edge look nice for scarves, it doesn't look as good on lace.
(---s1 is slip 1 purlwise with yarn in front ---)
For scarves:
Start each row with s1, k2 and end with k3.
This gives a slipped st edging with the slipped sts facing outward.
Though, .... for a feather and fan shawl, I instead began and ended each row with k1 or more. It remained flat since every very other WS row began with k17 and ended with k16. The alternate WS rows were k1, p across, k1. A garter sitch edging seemed too bunchy for the shawl.
For my latest (lace) knit project:
(RS): s1, k4, ... and end with k4, p1
(WS): s1, (k1 tbl, p1) twice, ... and end with (p1, k1 tbl) twice, p1
This lies flat and gives an edging with bumps plus a little interest and sturdiness to the edge.
For sock heel flaps:
(RS): k across
(WS): s1, p across, end with s1 (for a regular heel flap)
or
(WS): s1, (p1, s1) across, end with s1 (for thicker heel flap)
or
(WS1): s1, (s1, p1) across, end with s1
(WS2): s1, (p1, s1) across, end with s1 (for eye of partridge heel)
These give a slipped st edge that lies on the WS of the heel flap. (I like to do knit sts better than purl ones and so figured why not do the slipping on the WS.)
For dishcloths, I prefer not to start rows with slipped sts. However, the one dishcloth I made with a k1 edge didn't lie flat. So, in the future, I'm going to start and end rows with k2 (or more) or else start rows with (k1, p1) and end with (p1, k1) or some repeat of the moss st.
Finally, OfTroy has a nice summary of cast ons in several linked blog entries. (The picot cast on sounds interesting.)